Quite a bit like my pandemic riding mower electrification project. Except this cost $5000.
ElectricRidingMowerProject
Direct Drive 2.0
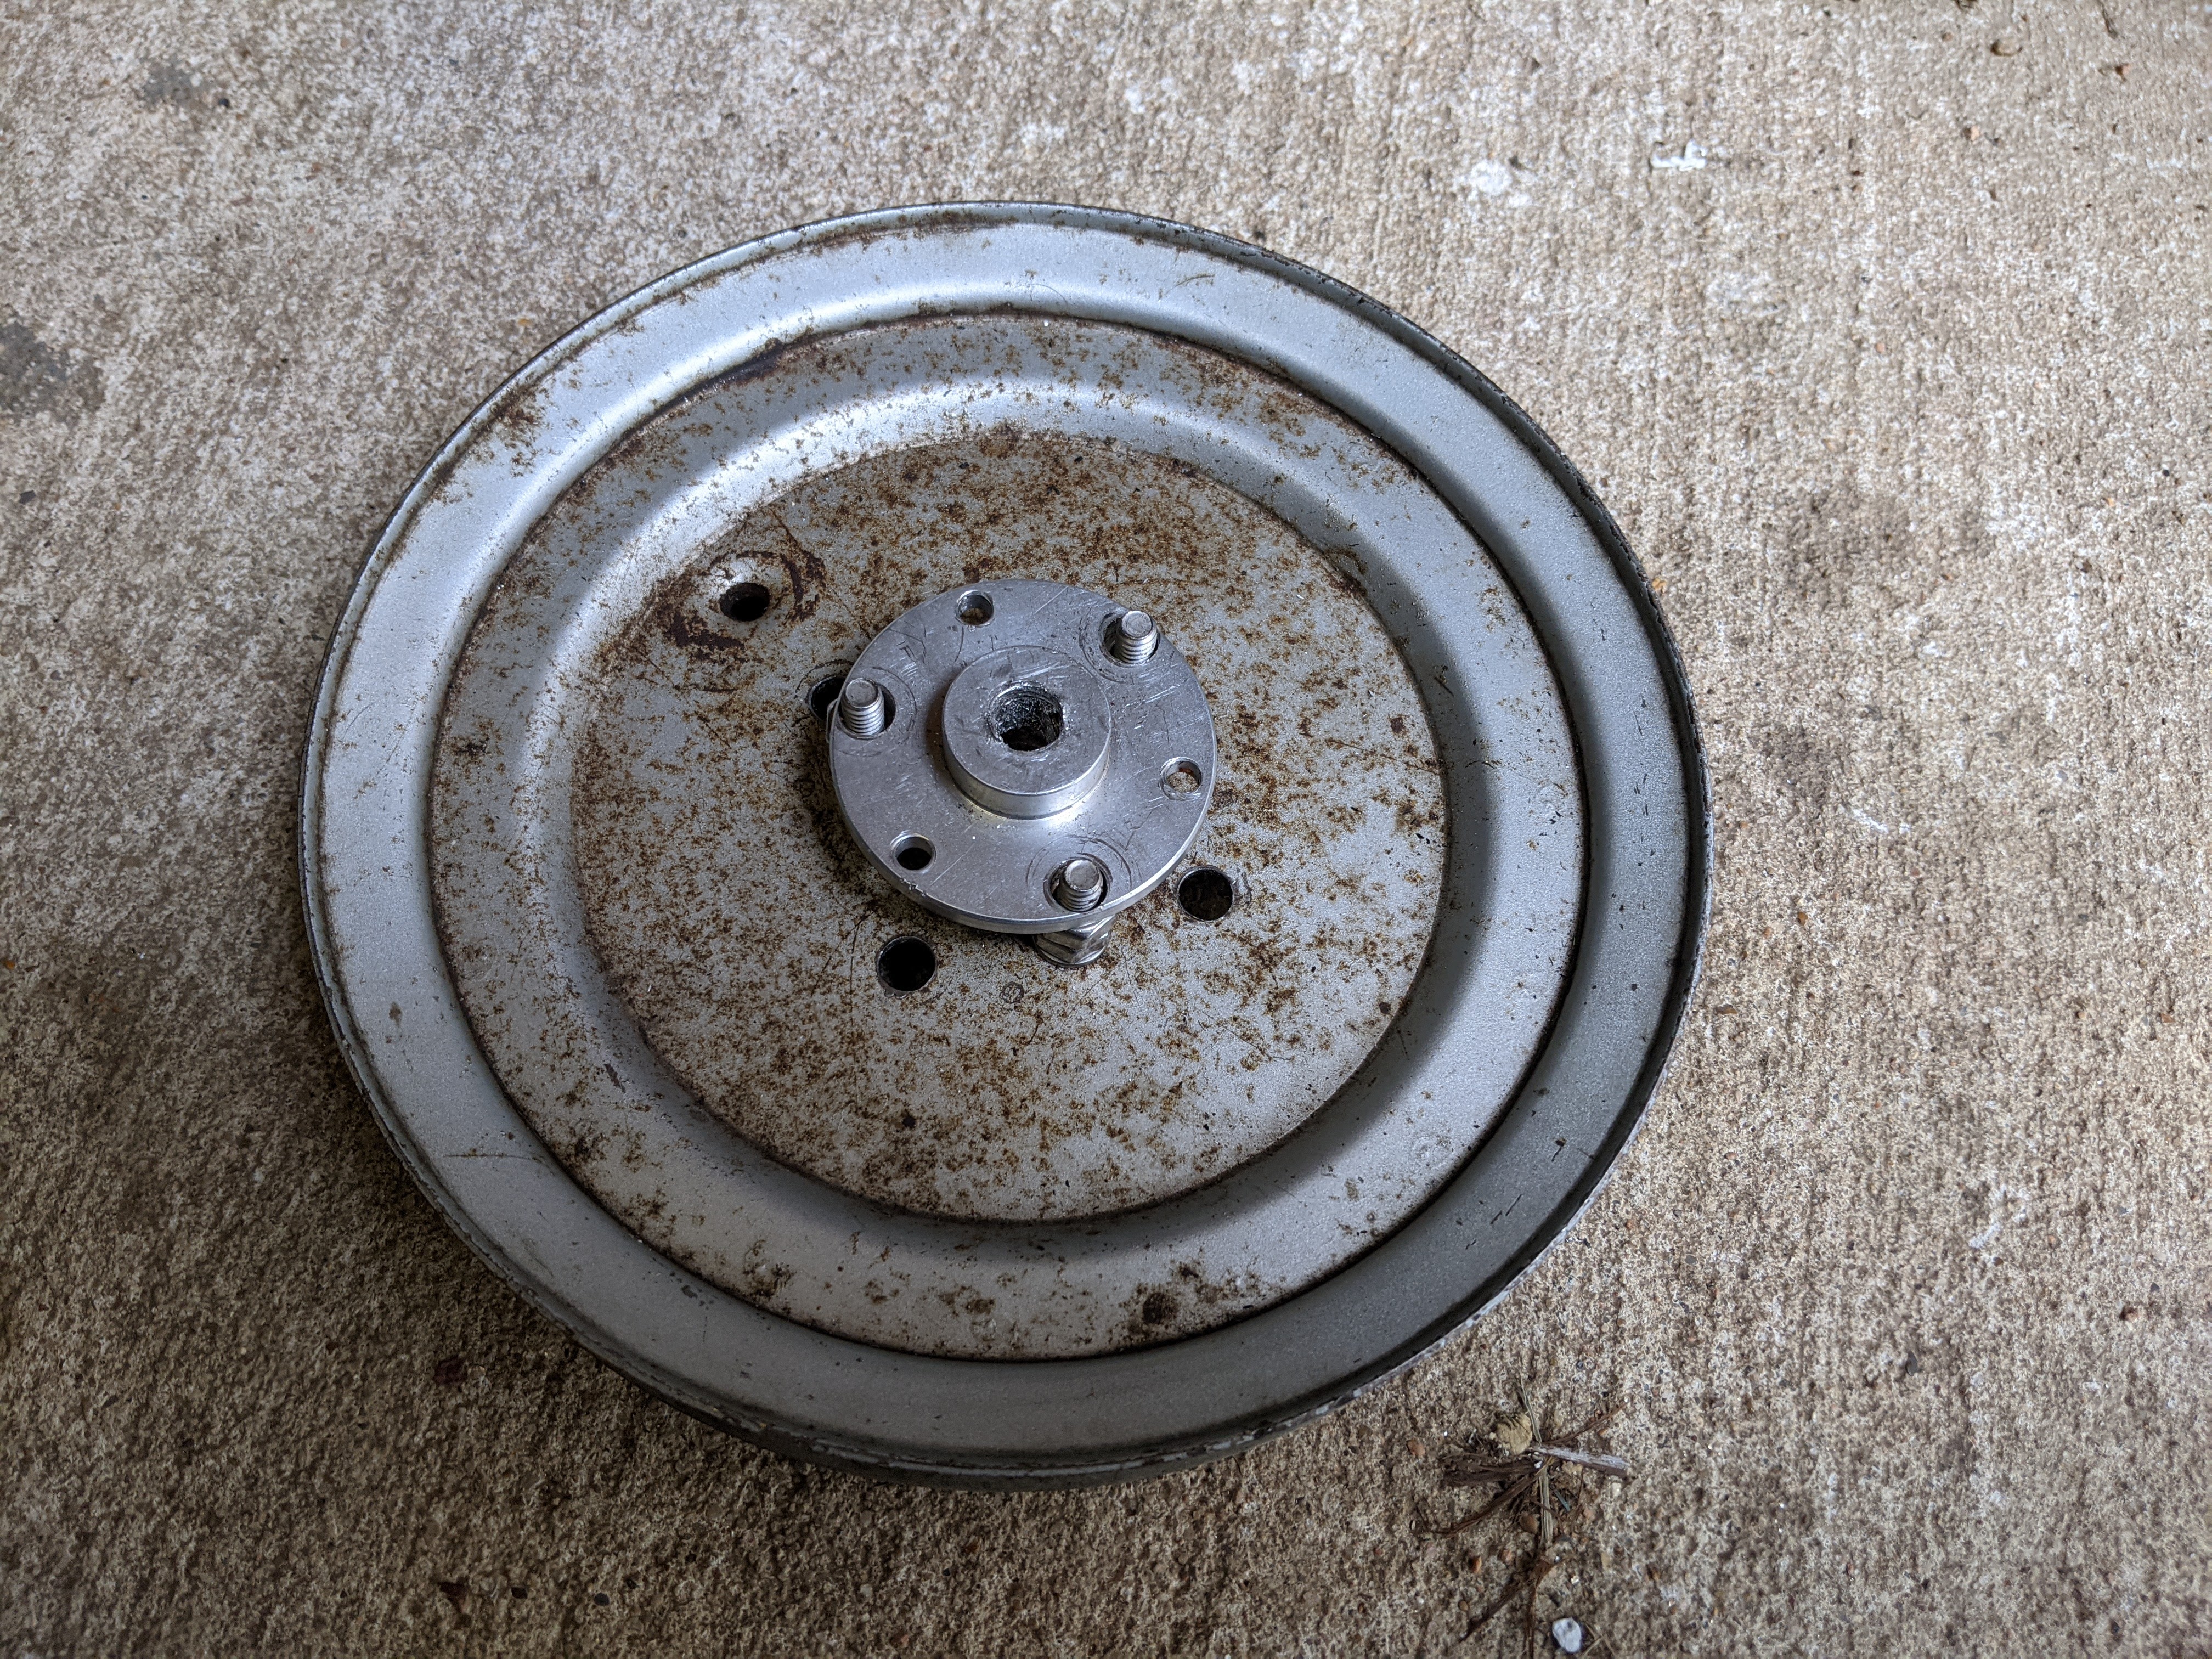
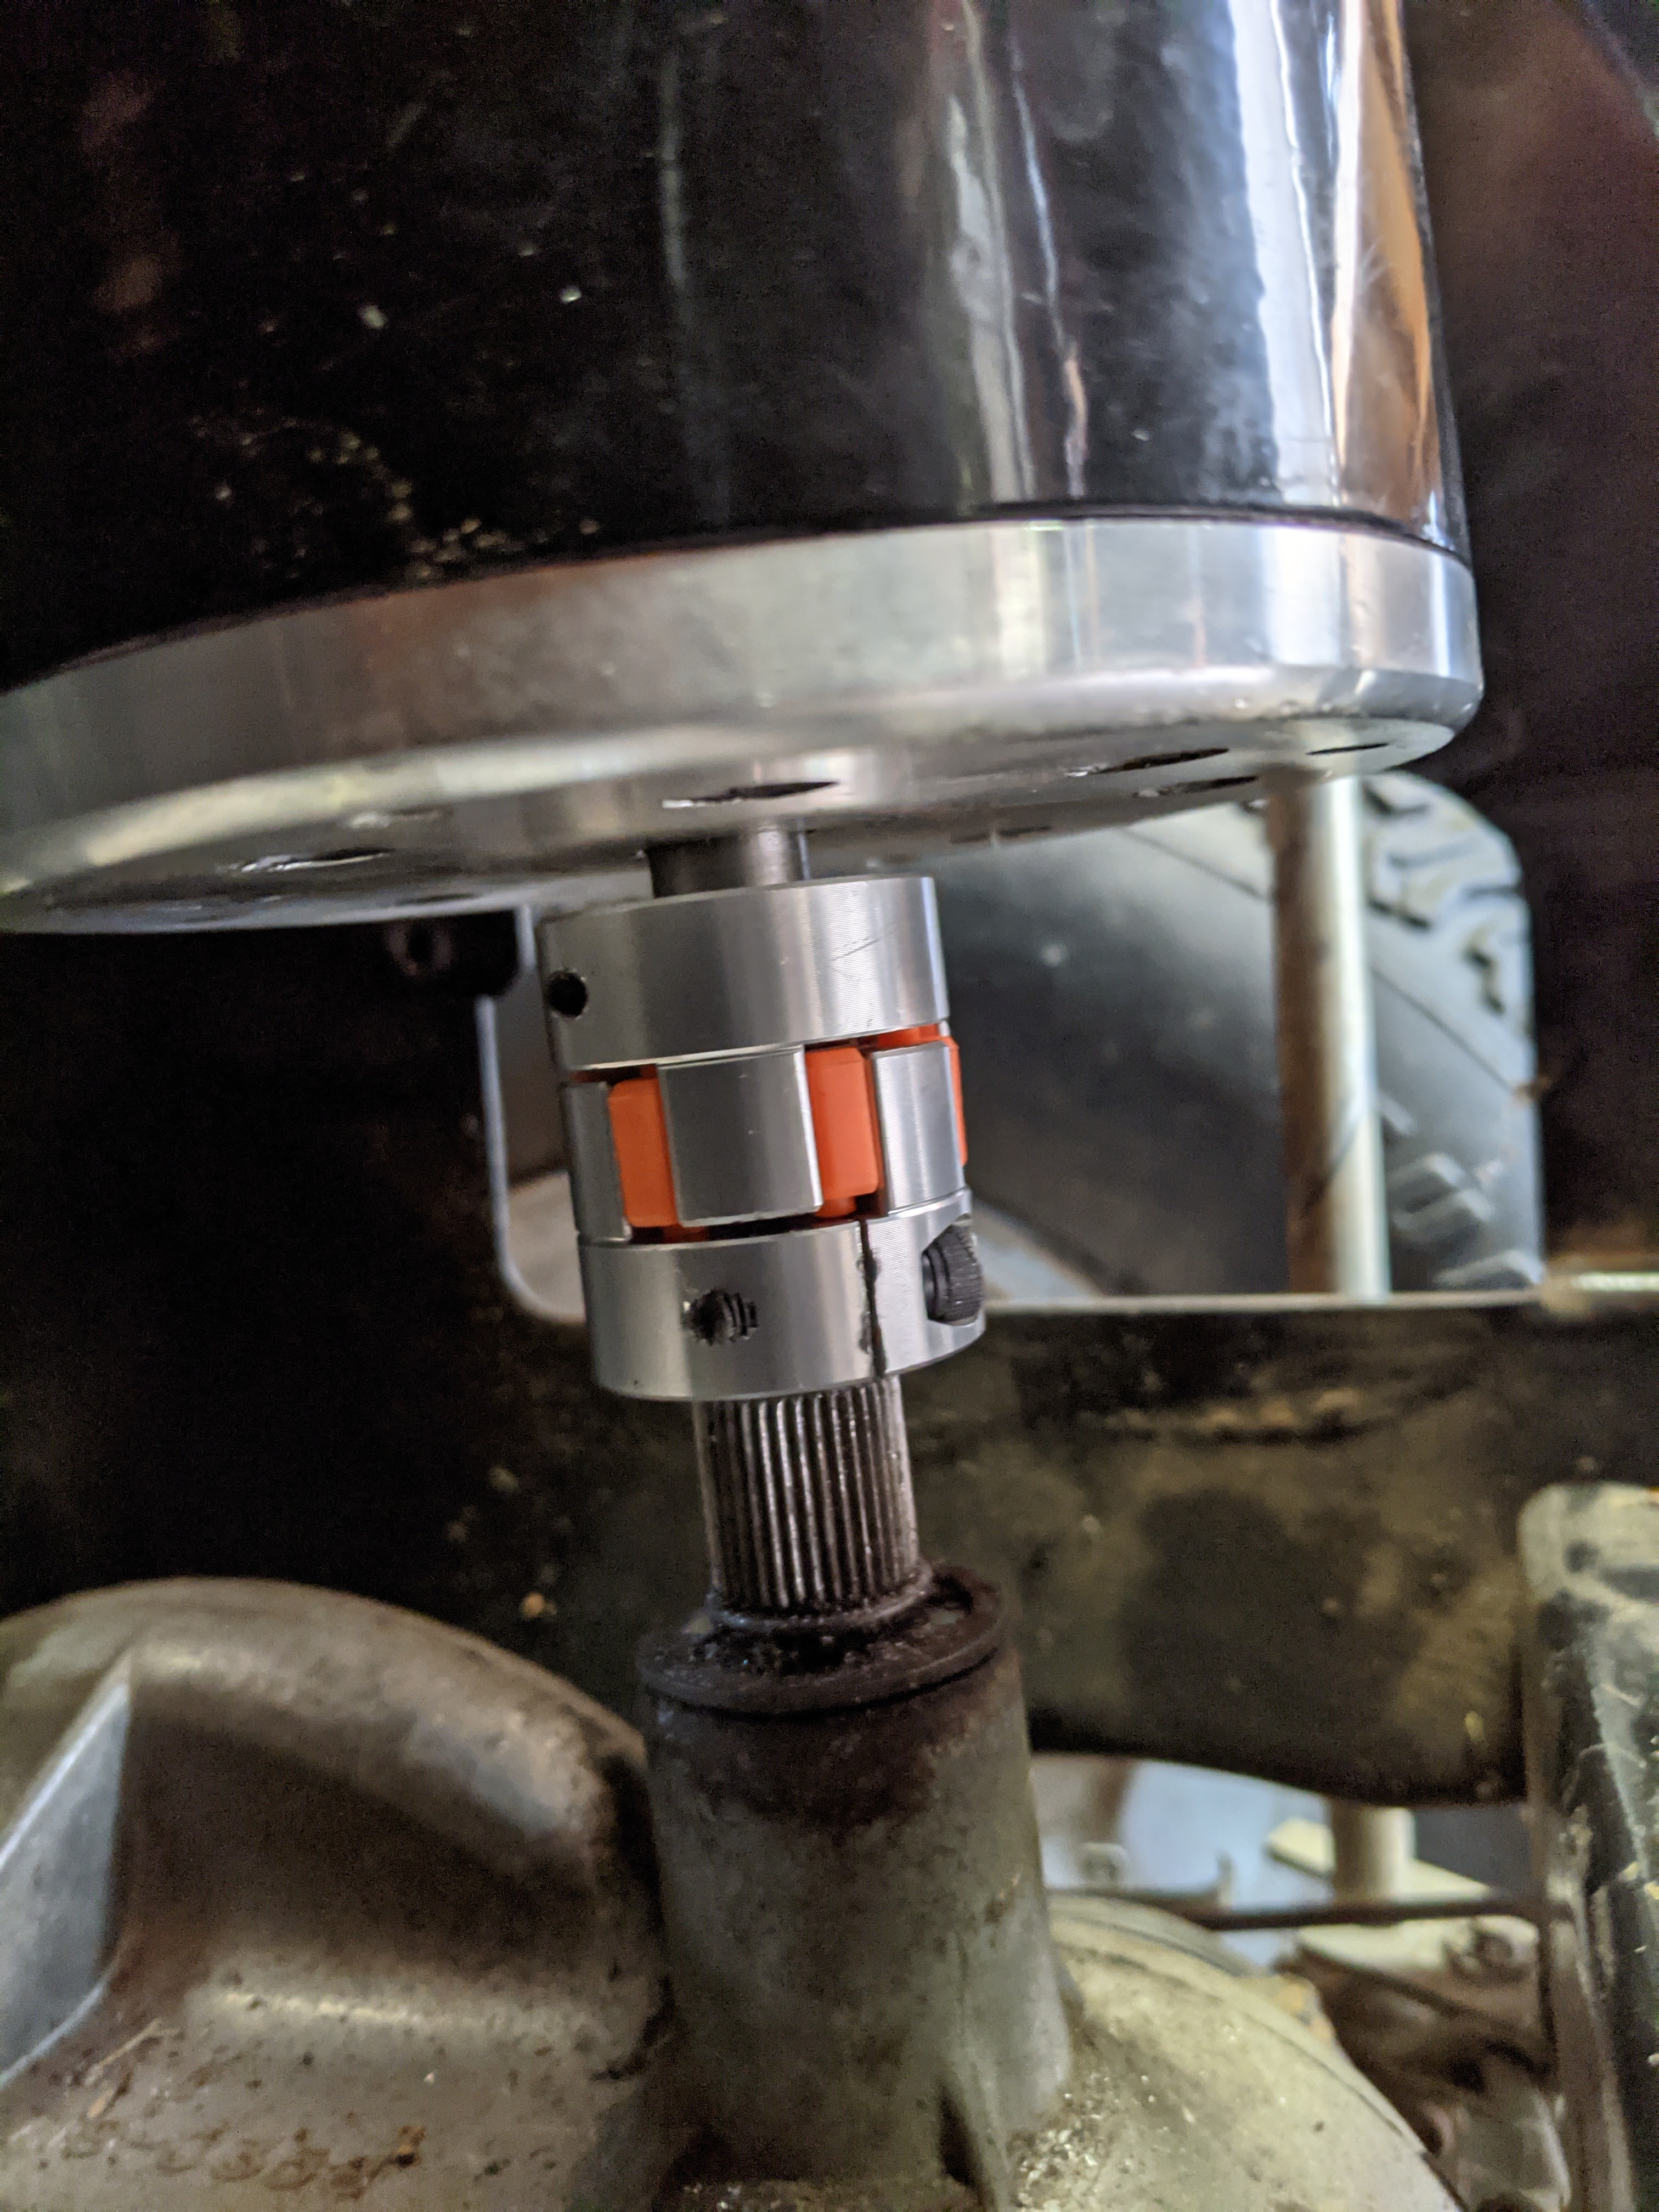
The mower project has been put aside for a few weeks. It seems I stripped the adaptor that connects the motor to the transmission. It was lightweight aluminum and I wasn’t sure it would hold up well, and it didn’t. I started looking at shaft adaptors again. I considered these originally but I was mostly worried about damaging the motor and transmission shaft. I found this shaft adaptor on Amazon that looked interesting. Turns out with a small amount of filing it was an all but perfect fit. It is also lightweight aluminum but it is a larger device that is certainly an improvement from the bolts and drilled pulley I had rigged up.
i was loathe to take everything apart again, but it wasn’t so bad. I was able to get the adaptor fitted to both shaft ends and even gave it a brief test. Seems solid and had less vibration. I will put the seat and fenders back on and try it out in a proper test run in the next few days.

First Mow
Got my second battery in and finished up the wiring. Made more use of these wire nut clip splicer (or whatever they are called). They not only connect wires, but also secure them. Once it was all wired up I couldn’t resist a quick test. The results were mostly good, and I would say everything functions well, but I ran into a couple of hitches.
First, I was worried about the swinging of the blade unit. It did tilt forward and “dig in”, but nothing broke. I probably need to put in a spring to keep the blade unit from swinging back too far. I’m also considering cutting some of the front faces of the blade shields down a bit, exposing the blades, at least on the front side. They are underneath the mower and shouldn’t be a safety problem. Should allow better cutting. I’ll note string trimmers that use these blade do this.
Second, I blew another fuse. This is the one I have on the big line connecting the batteries. I bumped it up to 35A. It blew when I tried to move forward from a stop in the grass. Not sure how to handle this. Tempting to remove the fuse and rely on the circuit breaker.

Mower Final Assembly
I started out planning on putting the main power wires for the blades and drive motor into a conduit and securing them. I will eventually have to do this. I wasn’t going to do the final assembly because I was waiting on some lock washers from Amazon. Turns out I found a few washers and was able to move forward.
I finished the blades PVC work and added a bit of black paint. Then I got to securing the aluminum plate that will interface the blade unit to the lift mechanism. All went well, and the sun was out and the weather was cool, so I pressed on.
Put the mower on its side to attach the lift mechanism. Even without the old 14 HP gas engine and old blades and deck it was still heavier than I expected. After some wrestling I had the lift mechanism in place and connected. At this point it was an easy maneuver to attach the blade unit, so I did. It worked surprisingly well.
Was tempted to strap on the single 12V battery, wire up the blades and give it a run, but it was getting late. Enough success for one day. Truth be told, with all the rain, I need to mow. Will be a good test. Maybe tomorrow. Not a real test. Need to wait for Lowe’s to deliver the second 12V battery.


More Mower Batteries
Decided to order two 22ah gel SLAB batteries. Wasn’t ready to take the plunge to lithium, but decided to at least get two new, appropriate batteries. Bad news is, Lowes only delivered one battery. After some discussions, it seems the second one will be here in a week. So much for finishing up this week. The good news is the batteries are about half the size of the existing batteries so I took apart the battery mount and expect to have something simpler. Did a small bit of wiring clean up and getting the last of the PVC pipe done on the blade unit. I suppose I will get everything wrapped up and maybe test at 12V and then just pop the second battery in when it arrives next week.
Mower Batteries
Was away for a while and have been busy with other things and haven’t had time to wrap up the electric mower project. Just went to give it a quick test drive, since I hadn’t tested the brake switch that shuts off the motor. Good news is that it works, the bad news is one of my two batteries is dead, or at least pining for the fjiords. Was able to drive around on 12V, but slowly.
The battery was old and was the original starter battery for the mower when it ran on gas. I bought a second just like it to get up to 24V, but it wasn’t really ideal for the job. I’m thinking of options, including some nice new lithium batteries. They are expensive (relatively) but my next project was to play around with some solar panels and battery storage, something that could be useful here in Texas. I have heard of talk of people using their electric car batteries as home storage, so why not use a riding mower? Ok, maybe just to power my shed.
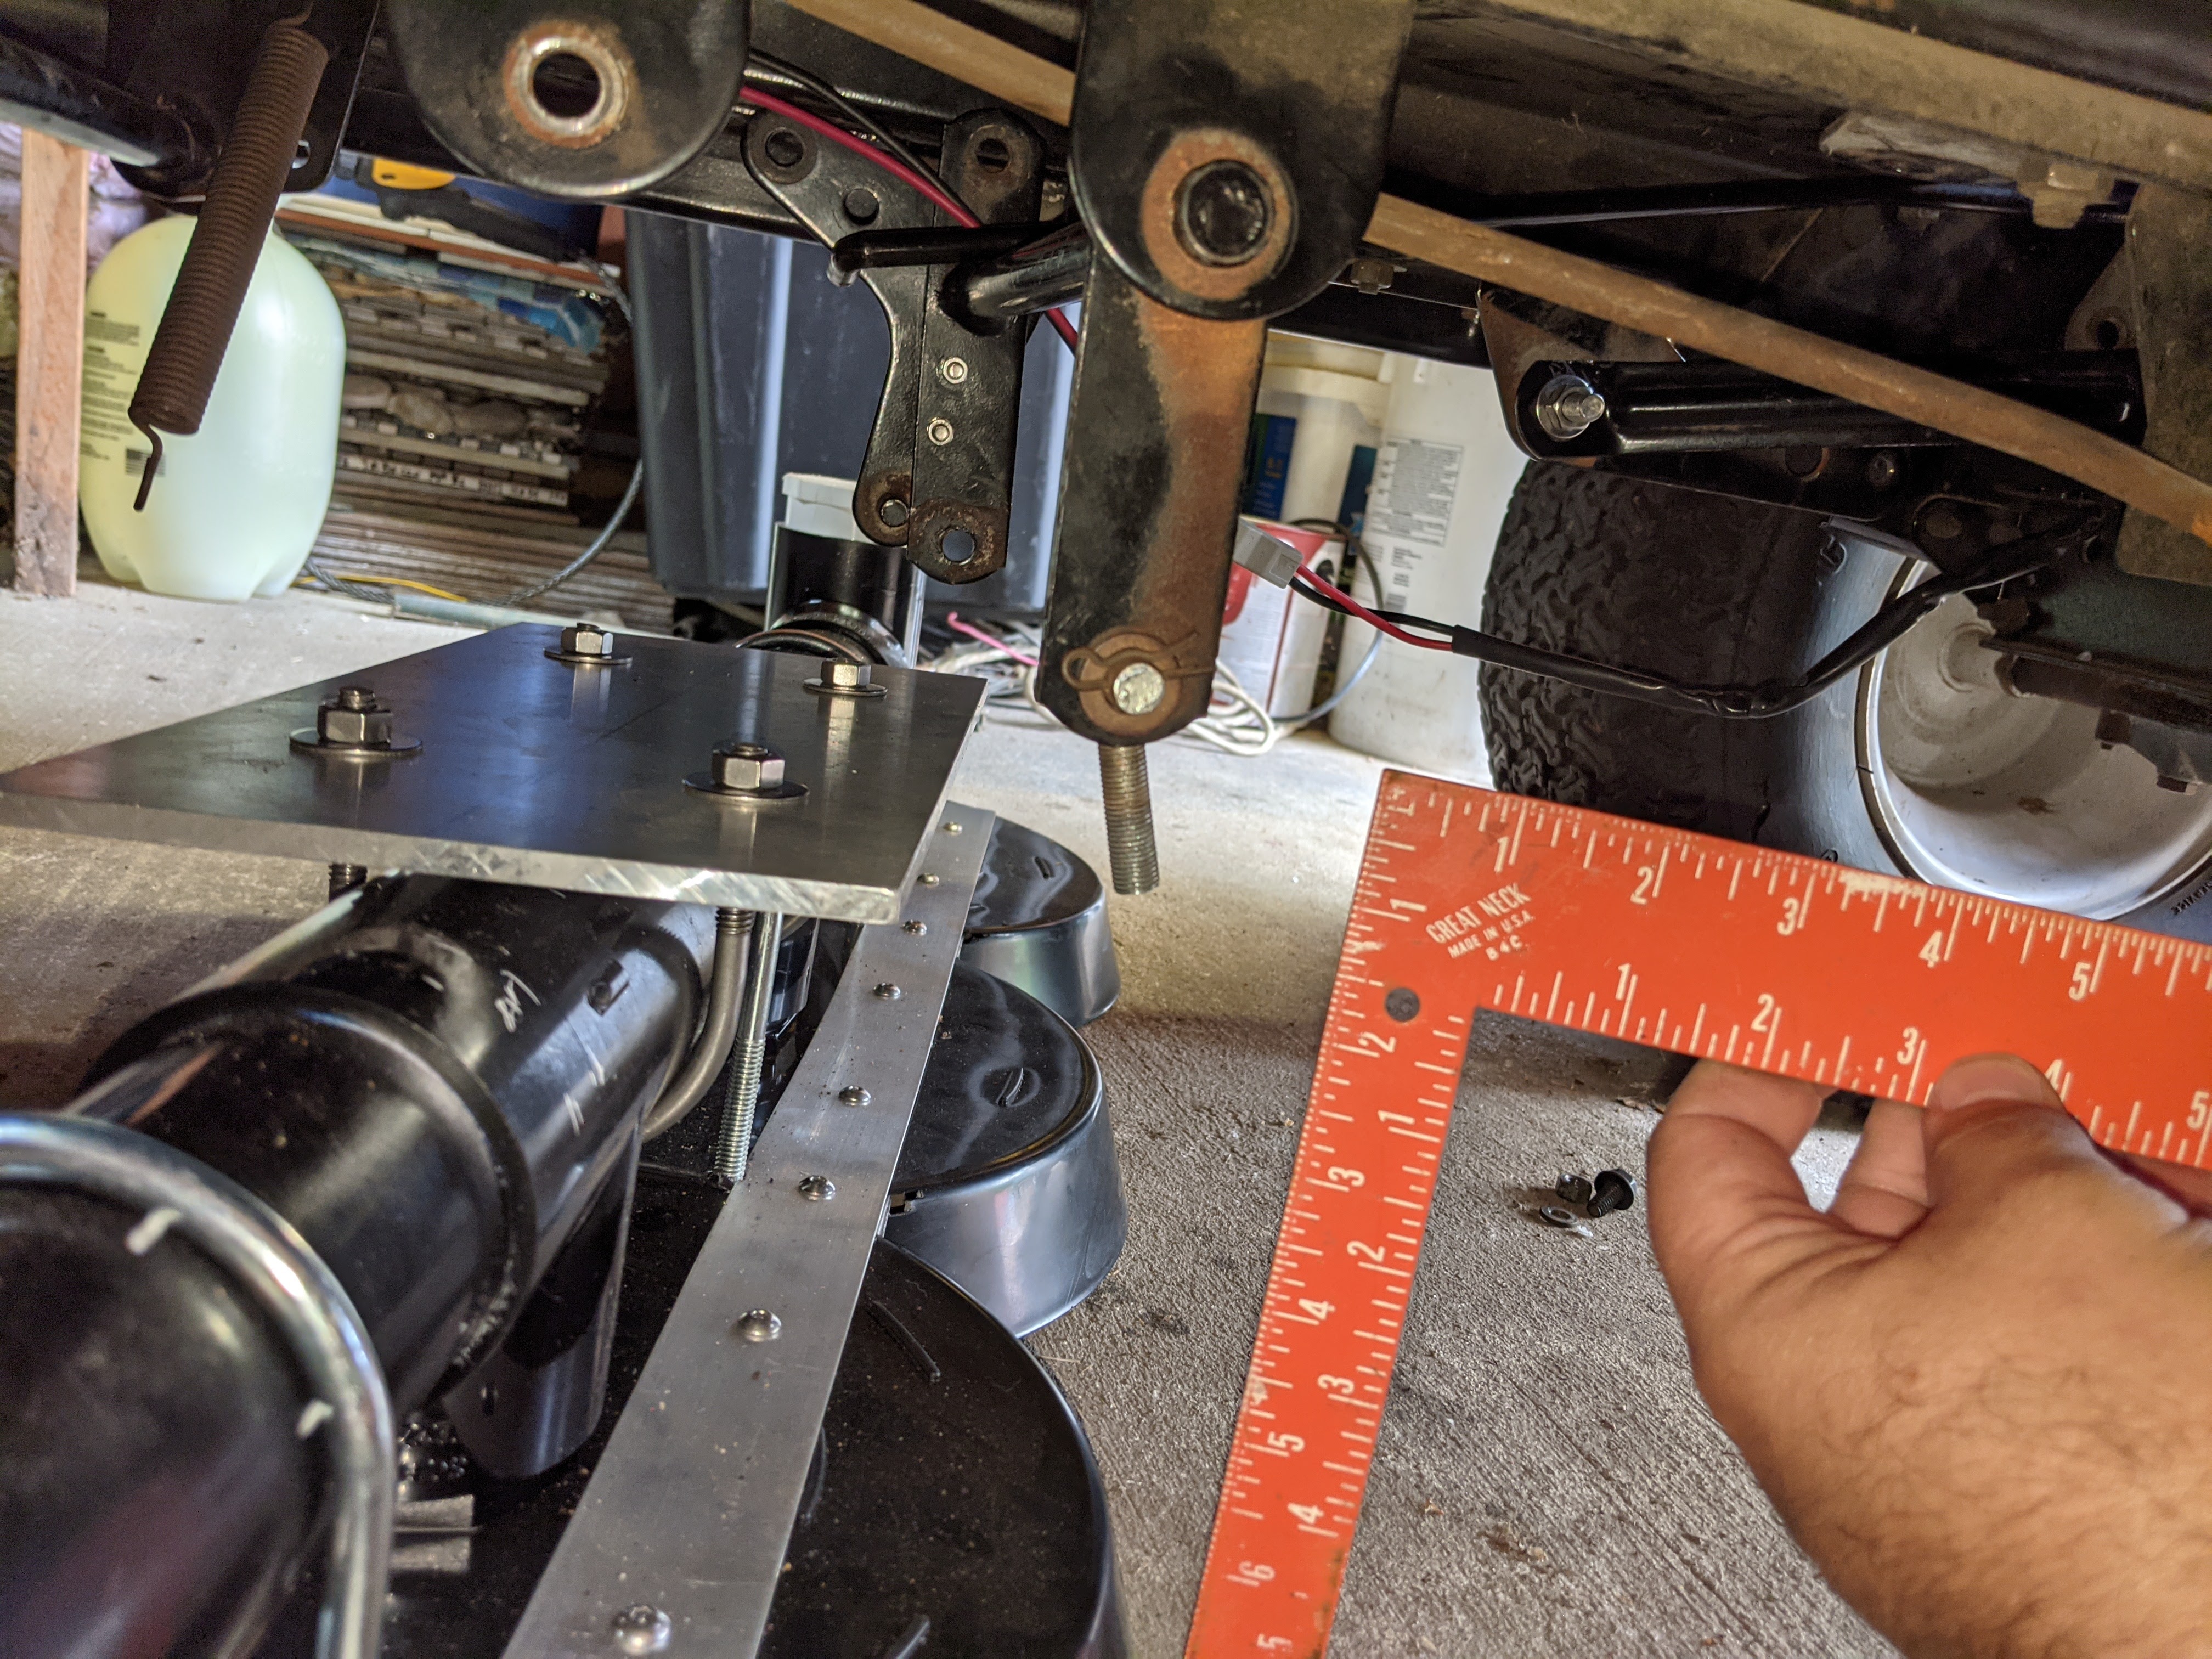
Threads and Nuts
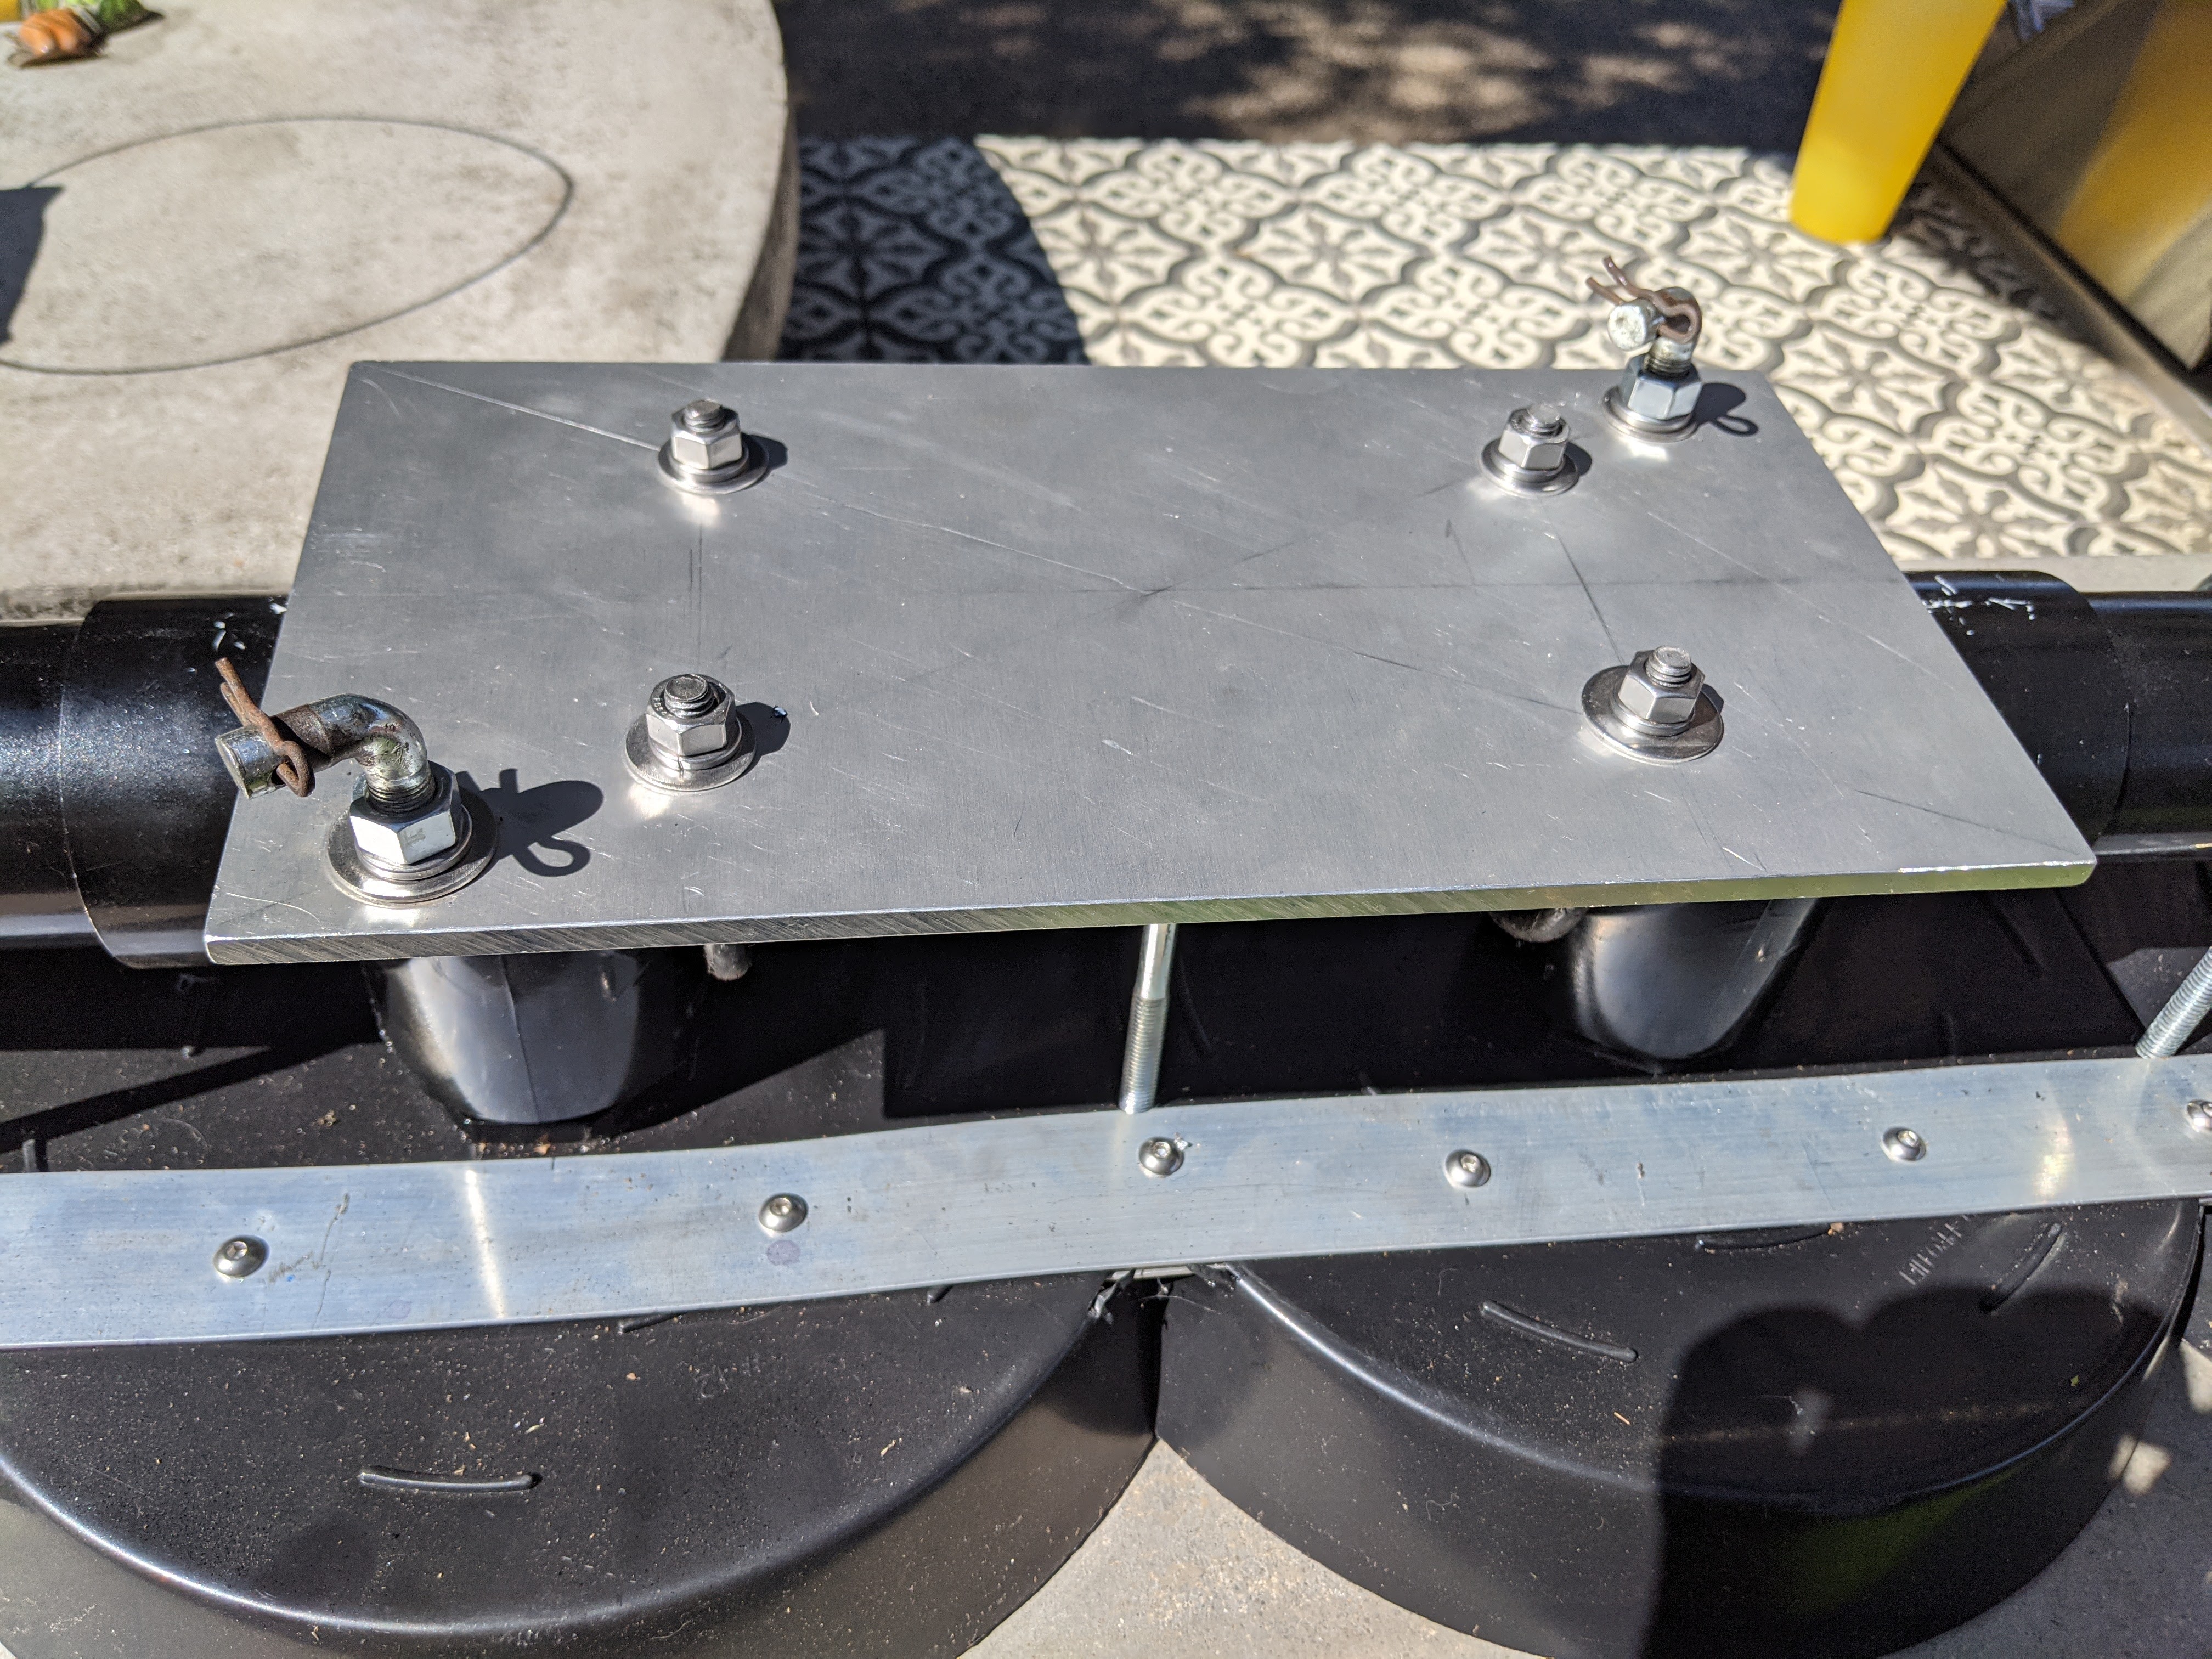
I bought a quarter inch aluminum plate and mounted it to the blade unit using some muffler clamps (they were exactly the right size). This should let me mount the blade unit at an angle. I was able to re-use these hook shaped bolts. The distance from maximum to minimum height looks good with maybe 3″ – 4″ maximum height, which is about what the old mower had. All I needed was some nuts to fasten the bolts to the plate. Had some that were the right size, but the threads were wrong. They weren’t metric so not sure what the issue was. I see there are different thread sizes and this was obviously more threads per inch than my standard bolts. I ordered some on Amazon, but somehow ordered 5/8″, which is way too big. I would say I meant 5/16″ but it really seems to be 1/4″ (4/16″). Will have to wait for another Amazon cycle. Will probably order some conduit to secure and protect the wires and then that should be it for version 1.0

One Last Piece
The electric riding mower is almost ready for its first test. I am happy with the drive train and have even added a switch to the brake that that turns off the motor when braking. I was going to turn off the motor manually when braking, but too easy to burn up another fuse that way, or worse.
Still playing around with how to attach the lift mechanism to the blades. My biggest concern right now is what happens when you bump into something. The old gas mower was heavy duty, and I still managed to bend and break stuff. This won’t be as strong and will break more easily. I just don’t have a good feel for how much movement to allow. The old deck was mounted at four points which was more stable. This will be just two points. Maybe I should have kept more of the old lift mechanism, but it was a bit complicated. Right now I’m thinking of ways to limit movement. Things will break if you hit them hard enough, but I’m going to try to keep it to a minimum. Actually I suppose I will be easier on this machine than I was on the old gas mower.
One other bit. Sometimes my progress depends on Amazon deliveries. There are two parts to the old lift mechanism. I want to reuse them and each has an advantage and disadvantage. I’m also learned that although they seem interchangeable, one is maybe a quarter of an inch offset. Nothing some big washers wouldn’t fix. Except I didn’t have any big washers. So two days to mull it over while Amazon ships my washers.


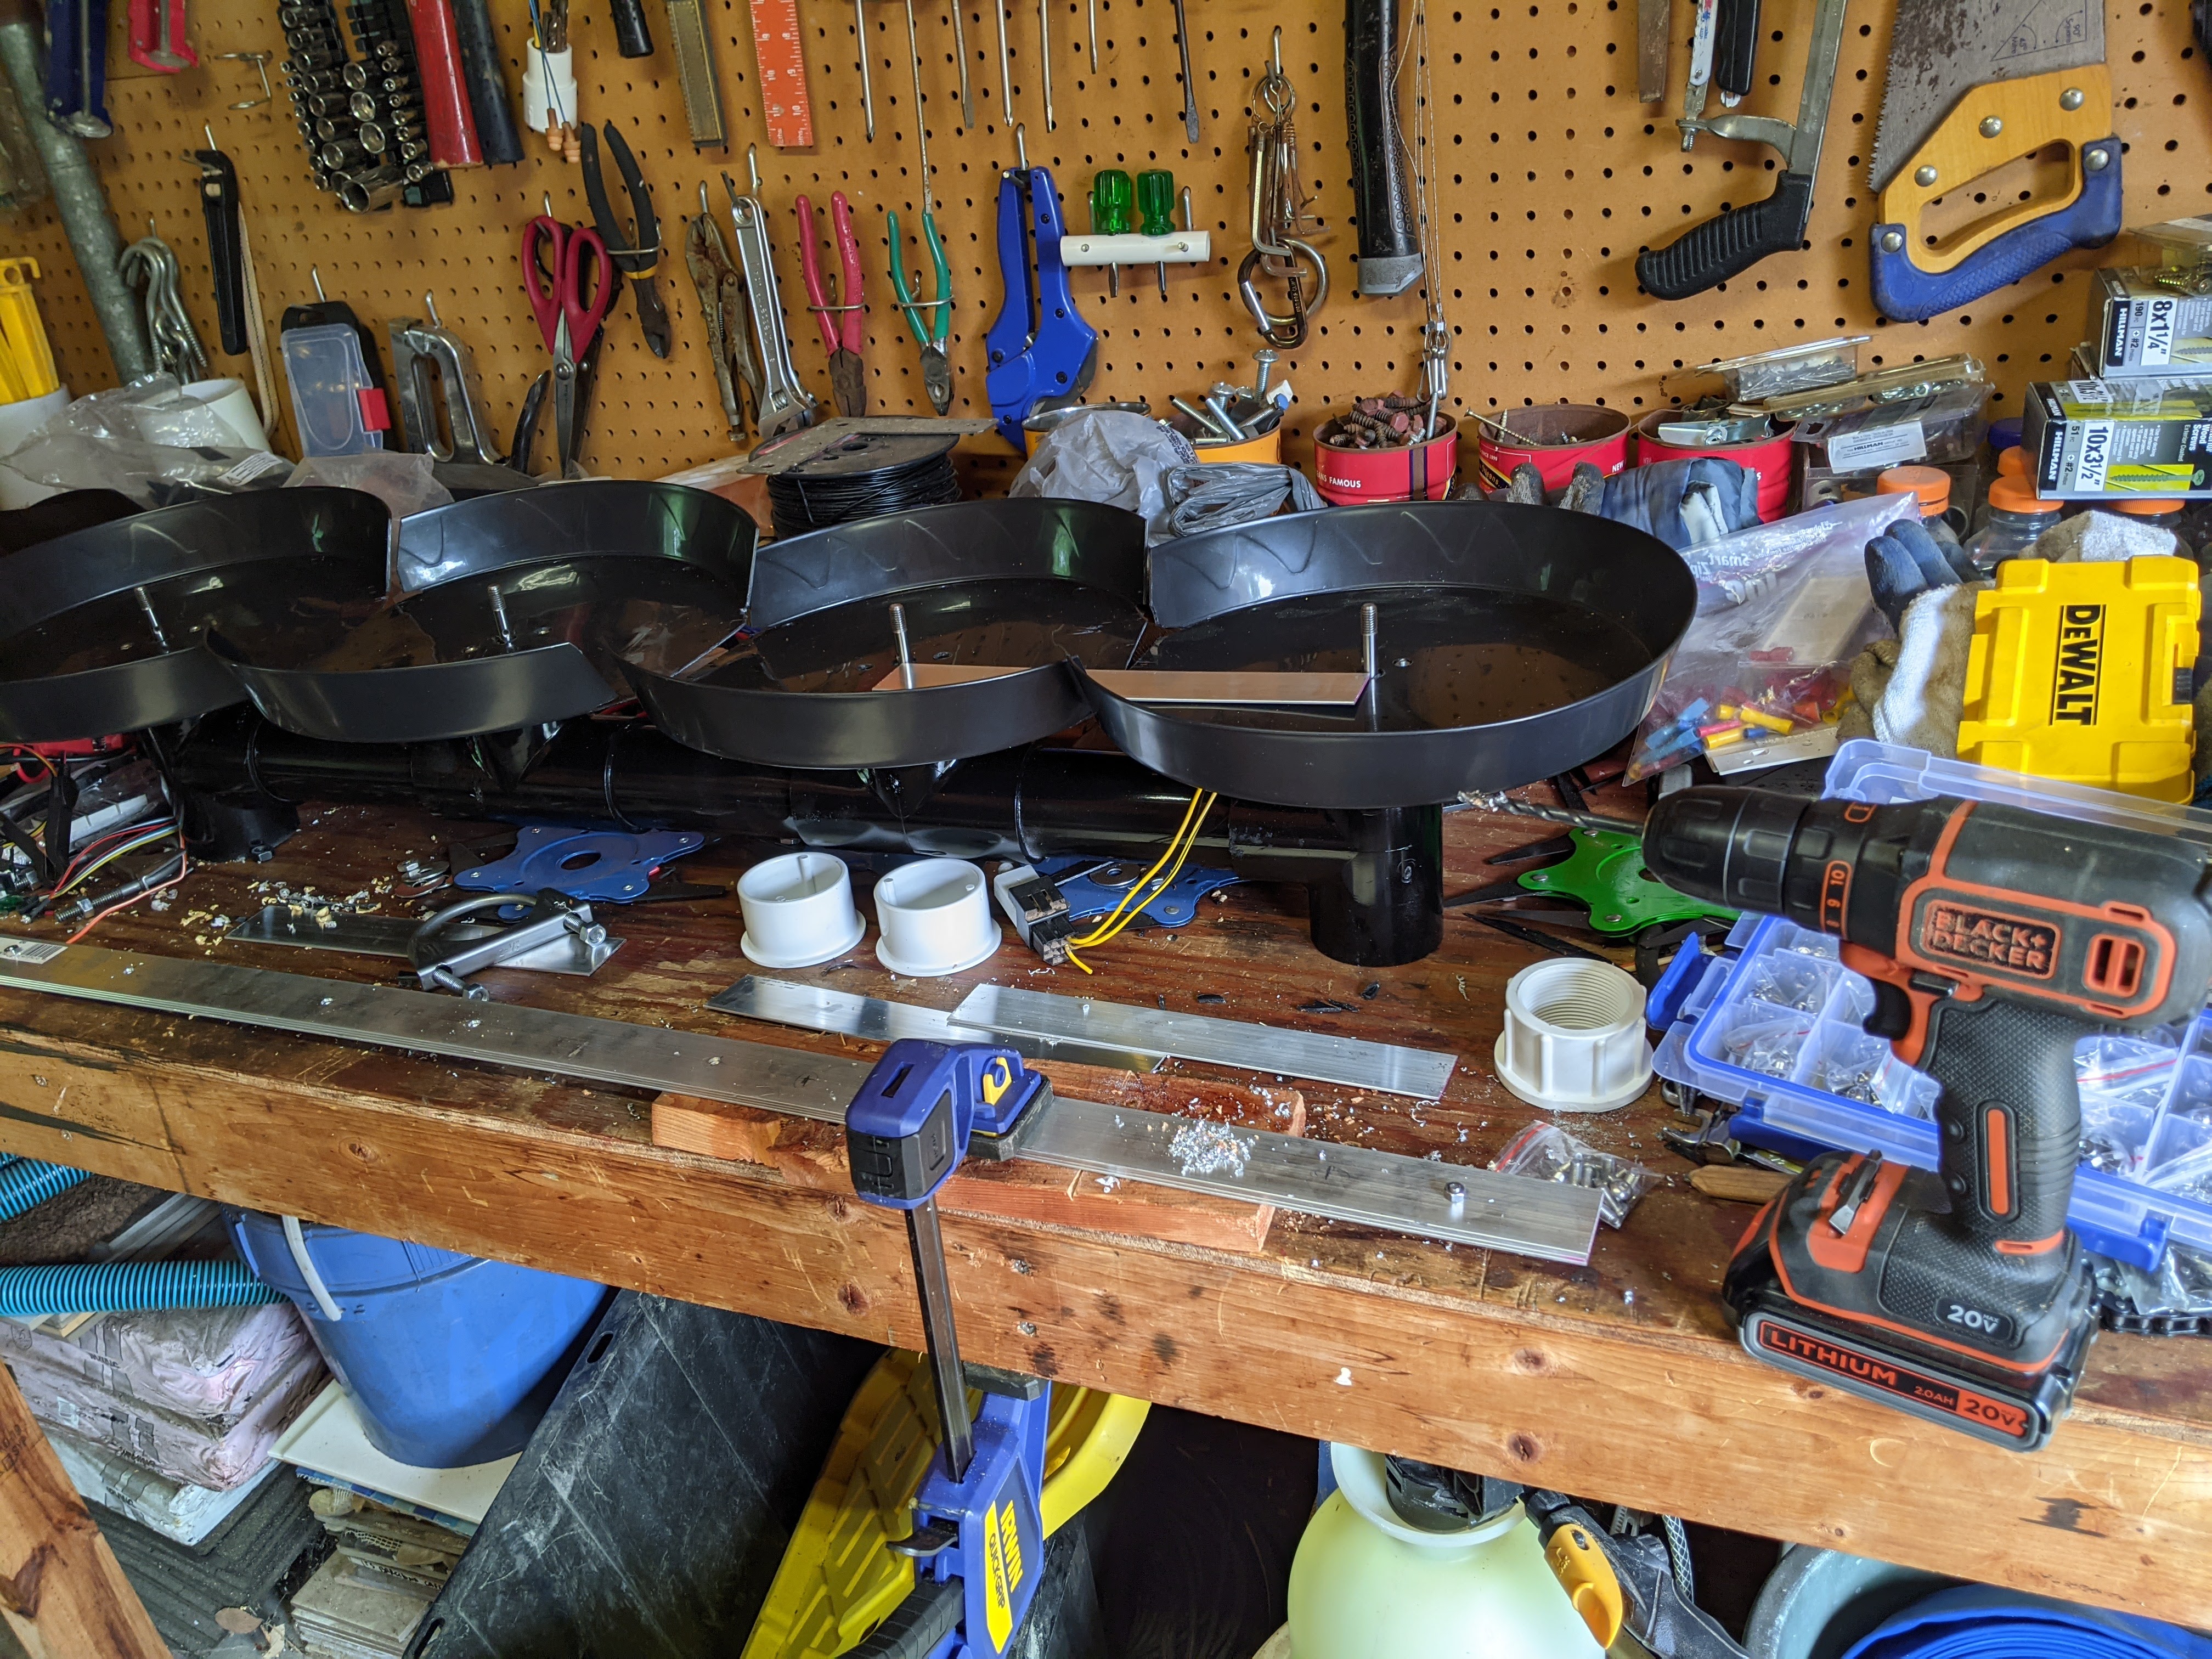
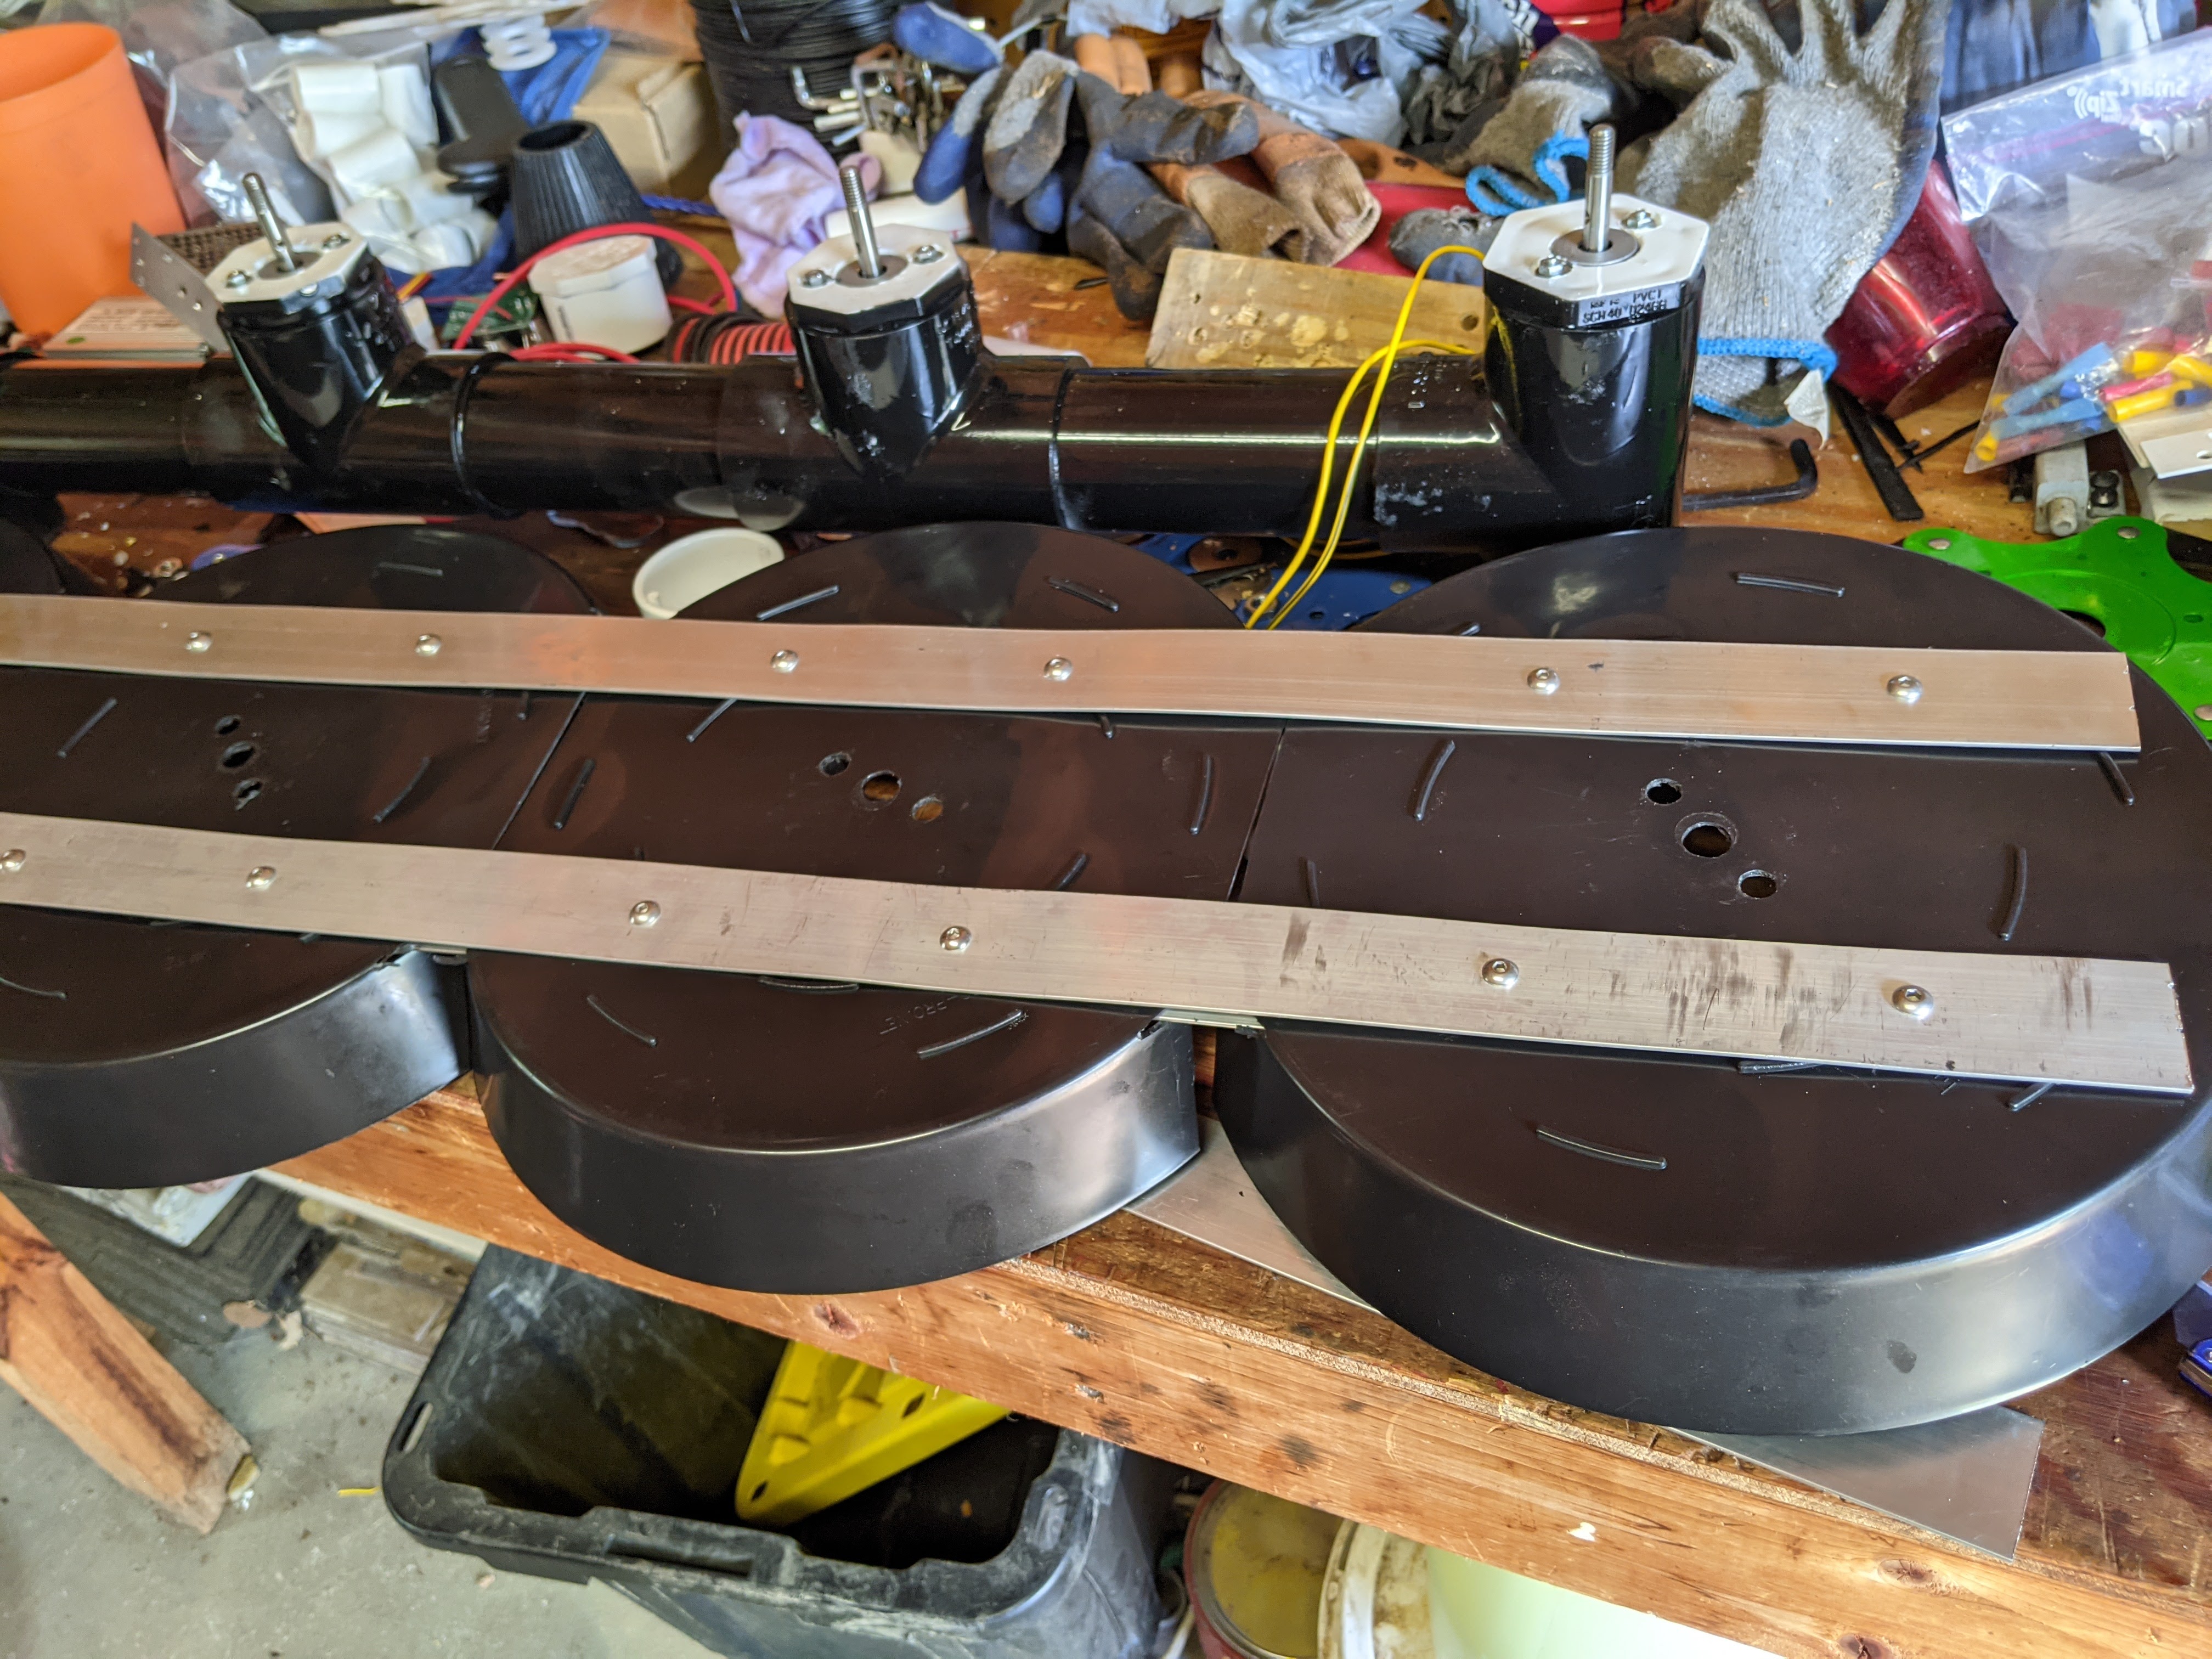
Electric Mower Blade Covers
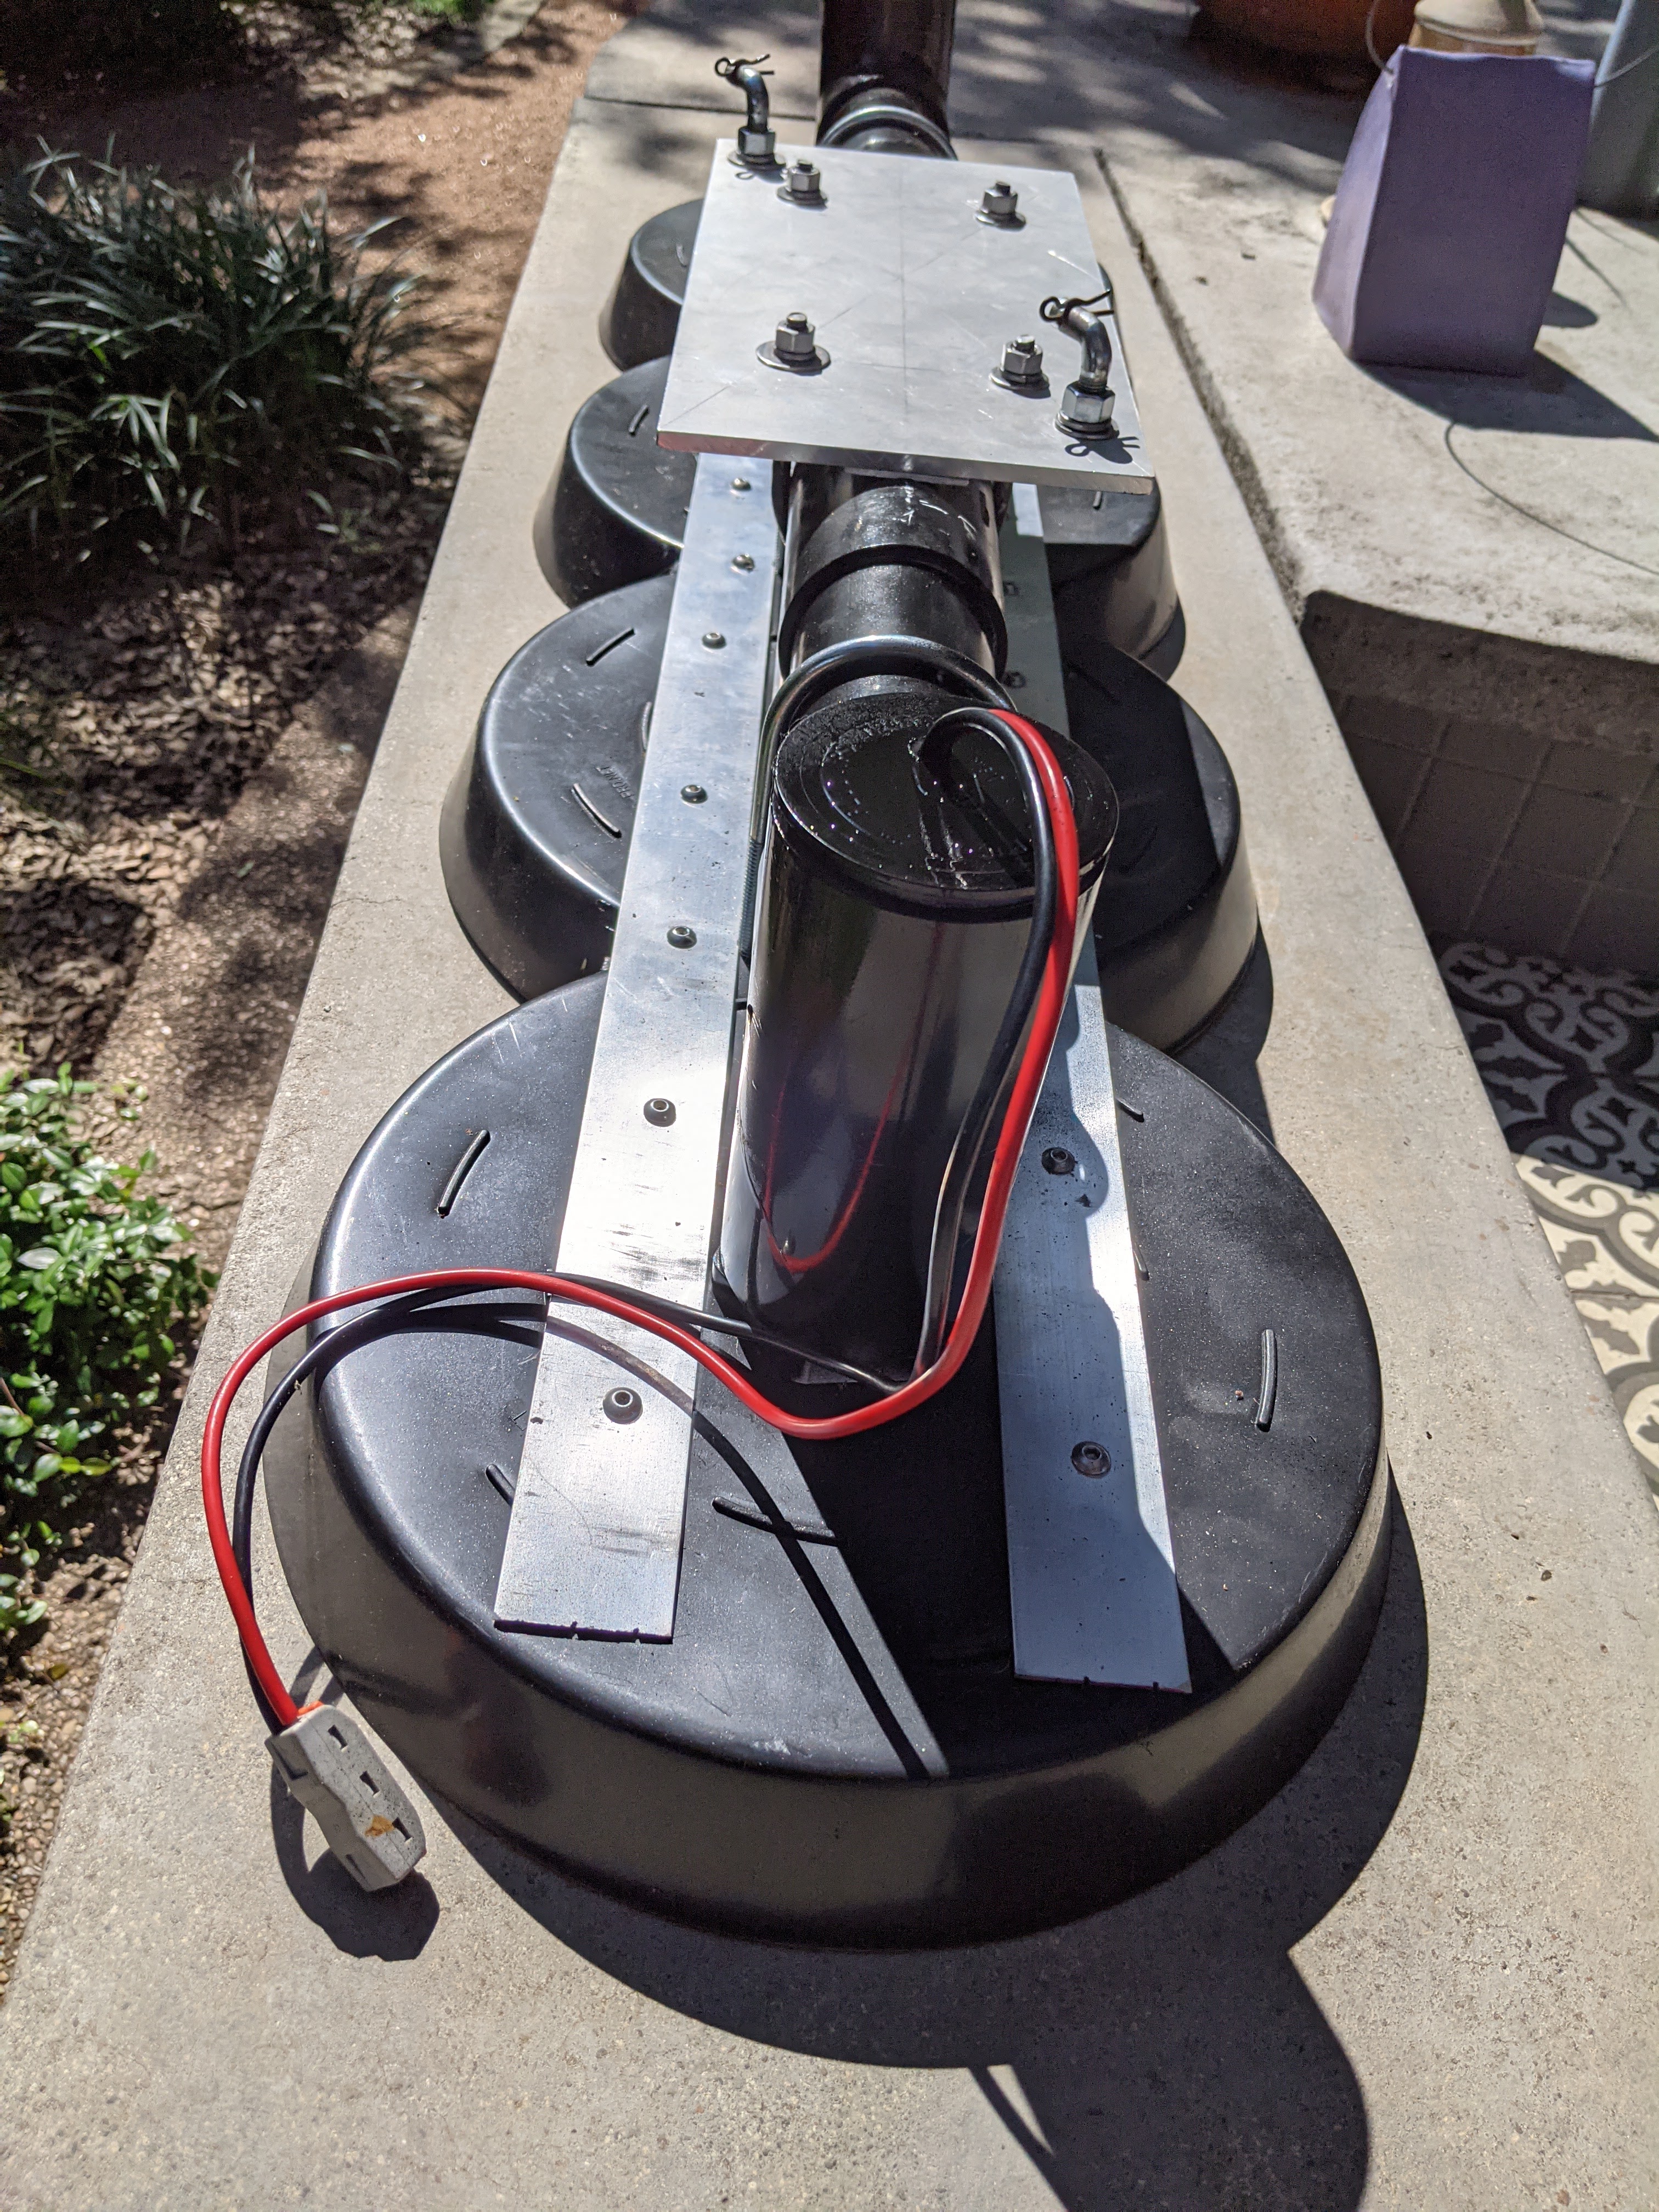
I glued the PVC pipes for the blade unit and even painted it all black. I needed some way to cover the blades, mostly to prevent accidents. Not likely these little blades will be throwing rocks around. I found some plant saucers on Amazon that looked like they could do the job. The problem is how best to attach them. I bought some aluminum strips and decided to bolt them together. Some cutting, drilling and bolting and I made a nice little cover for the blades. Bought some u-bolts to attach the cover to the PVC pipe, which is going to require just a little more drilling.
I went back and re-installed the big handle to raise and lower the blades and re-purposed some of the mechanism used to lift the original deck. Instead of four offset lift points, I now have just two parallel to each other. The last job is to figure out how to connect the whole blade unit to these lift points. It needs to be offset to give some overlap in the blade paths so that there aren’t uncut stripes in the grass. Also hope the whole arrangement is flexible to handle a bit of collision but not so flexible that the blades move around in normal use. Almost there.
Electric Riding Mower Direct Drive Test Video
Forgot to mention I also have fully functioning brakes, an important bit. It is much faster than the chain drive but can still run it full bore at maybe 10 m.p.h. Enough for a mower, I suppose. Also this didn’t seem to put any strain on the motor, which stayed cool. Also noticed my older battery is going bad and neither is fully charged. So maybe it would be a little bit faster. I’m starting to lust after those pricey lithium batteries. Much quieter than the old mower but the transaxle probably needs some grease, after 20 years of mowing in the Texas summer.
